mercredi 8 juillet 2026

Deglazing Pan Drippings into Gold

Deglazing Pan Drippings into Gold - Savory Secrets

Deglazing Pan Drippings into Gold

Every home cook dreams of infusing their dishes with that elusive, restaurant-quality depth of flavor. Often, the secret to achieving this gourmet distinction lies not in complex ingredients, but in mastering simple, fundamental techniques. One such culinary cornerstone, a true chef's secret passed down through generations, is the art of deglazing. It's the magical process of transforming those seemingly insignificant, browned bits stuck to the bottom of your pan – often mistaken for mere residue – into a liquid goldmine of savory richness. Get ready to unlock an incredible world of umami and elevate your everyday cooking to an extraordinary culinary experience.

The Science of Sizzle and Stuck-On Bits

Before we can transform pan drippings into liquid gold, it's crucial to understand what they are and why they're so incredibly flavorful. When you sear, roast, or sauté meats and vegetables, a beautiful chemical reaction known as the Maillard reaction takes place. This complex interaction between amino acids and reducing sugars, accelerated by heat, is responsible for the enticing browning, the crust, and the hundreds of new flavor compounds that develop on the surface of your food. As the exterior caramelizes and browns, tiny particles – proteins, sugars, and fats – detach from the food and adhere to the bottom of your hot pan. These delightful, browned fragments are what chefs affectionately call "fond" (French for "bottom" or "base"), and they are an intensely concentrated reservoir of savory, roasted, and caramelized goodness. Far from being burnt or wasted, this fond is the very essence of umami, promising unparalleled depth to any sauce or gravy it becomes a part of. Understanding this scientific marvel is the first step to appreciating the culinary treasure hidden in plain sight.

Tools of the Trade: Your Deglazing Arsenal

While the process of deglazing might sound sophisticated, the beauty of it lies in its simplicity and the minimal specialized equipment required. You likely already possess everything you need in your kitchen to embark on this flavor-enhancing journey. However, knowing which tools are best suited for the task can make all the difference, ensuring efficiency and optimal flavor extraction. Equipping yourself with the right instruments isn't just about convenience; it's about maximizing the potential of those precious pan drippings and setting the stage for a truly remarkable culinary transformation. Let's gather our deglazing arsenal:

  • The Right Pan: Your choice of cookware is paramount. Stainless steel pans are ideal for deglazing because their surface allows fond to stick effectively without burning too quickly, and you can easily see the browned bits. Cast iron skillets also work wonderfully, providing excellent heat retention and a naturally seasoned surface that imparts its own subtle character. Avoid non-stick pans, as they are designed to prevent food from sticking, thereby preventing the formation of fond – precisely what we're trying to achieve!
  • Wooden Spoon or Sturdy Spatula: A robust wooden spoon or a heat-resistant silicone spatula is indispensable for effectively scraping up the fond from the bottom of the pan. The flat edge of a wooden spoon is particularly effective at getting into all the corners and ensuring no flavorful morsel is left behind. Avoid metal spatulas on non-cast iron pans, as they can scratch the surface.
  • Controlled Heat Source: Precision in temperature control is key to successful deglazing. You need a burner that allows you to quickly adjust from high heat (for searing) to medium or medium-low (for deglazing). This control prevents the fond from burning once the liquid is added and ensures a gentle simmer that extracts maximum flavor.
  • Your Chosen Deglazing Liquid: This is where the magic truly happens! A wide array of liquids can be used, each imparting its own unique character to your final sauce. Common choices include dry wines (red or white), various stocks (chicken, beef, vegetable, fish), spirits (brandy, bourbon), vinegars (balsamic, red wine, apple cider), or even plain water. The choice depends on the dish you’re preparing and the flavor profile you aim to achieve.

The Step-by-Step Deglazing Process

Mastering deglazing is less about complex steps and more about timing and technique. Once you understand the flow, it becomes an intuitive part of your cooking repertoire, a natural extension of your savory creations. This process is about coaxing every last drop of flavor from your pan, turning what might have been discarded into the foundation of something extraordinary. Follow these steps precisely, and you'll be well on your way to crafting exquisite pan sauces and gravies with confidence and flair, transforming simple meals into gourmet experiences that truly sing with depth and character.

Here’s how to execute this culinary wizardry:

  1. Remove the Cooked Food: Once your meat, poultry, or vegetables are cooked through and beautifully browned, carefully remove them from the pan. Transfer them to a plate or cutting board, leaving behind all those delicious pan drippings and the prized fond. If there's an excessive amount of fat, you might want to carefully pour off some of it, leaving just a tablespoon or two, to prevent a greasy sauce.
  2. Return Pan to Heat (if necessary): Place the pan back on the stovetop over medium to medium-high heat. You want the pan to be hot, but not smoking. A slight sizzle is good, but burning is not. The residual heat from cooking is often sufficient, but a quick reheat ensures the fond is ready to release.
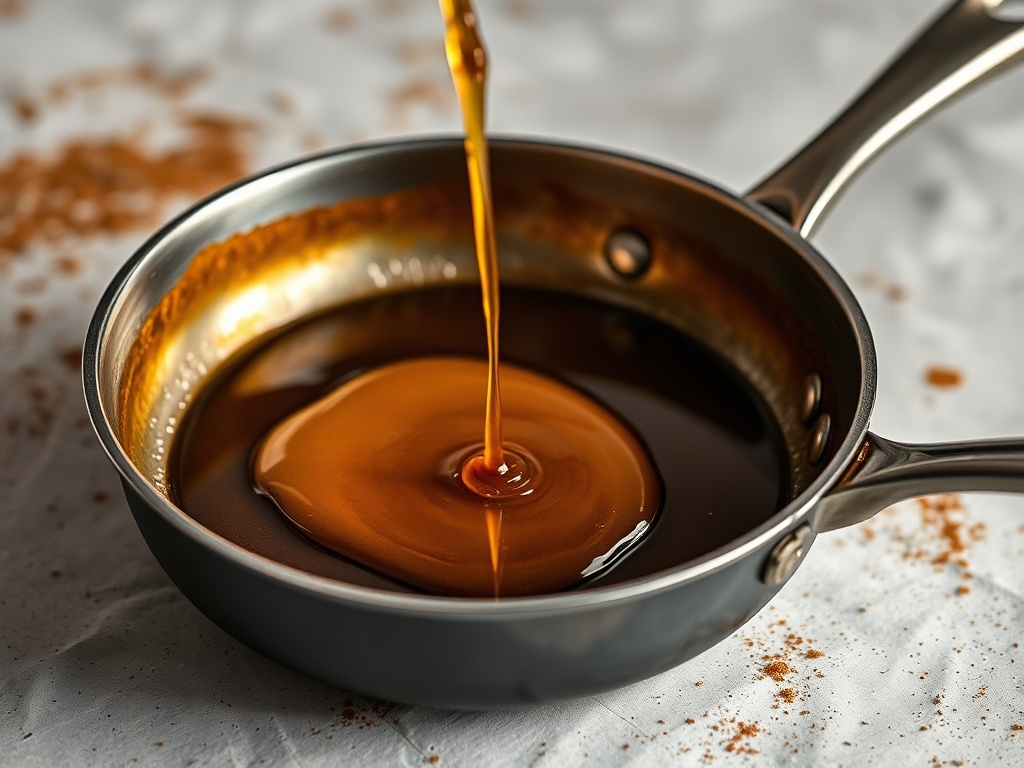
  3. Add Your Deglazing Liquid: This is the dramatic moment! Pour your chosen liquid (typically about ½ to 1 cup, depending on the amount of fond) directly into the hot pan. Be prepared for a burst of steam and a satisfying sizzle. The liquid will immediately begin to cool the pan, and as it heats, it will start to dissolve the fond.
  4. Scrape, Scrape, Scrape!: Immediately after adding the liquid, grab your wooden spoon or sturdy spatula and vigorously scrape the bottom of the pan. Work quickly and thoroughly, dislodging all those browned bits. They should easily lift off the surface and dissolve into the liquid, turning it a rich, opaque brown. Continue scraping for a minute or two until all the fond has been incorporated.
  5. Reduce and Thicken (Optional): Allow the liquid to simmer gently, reducing by about half or until it reaches your desired consistency. As it reduces, the flavors will concentrate, intensifying the umami. You can then whisk in a knob of cold butter for richness and shine, or a slurry of cornstarch or flour for a thicker gravy. Season with salt and pepper to taste.
  6. Strain (Optional): For an ultra-smooth sauce, you can strain the deglazed liquid through a fine-mesh sieve to remove any small solids, although many chefs prefer to leave them in for added texture and rustic appeal.

Flavor Pairings: Choosing Your Deglazing Liquid Wisely

The beauty of deglazing lies not just in the technique, but in the myriad flavor possibilities it unlocks through the careful selection of your deglazing liquid. This choice is a culinary art form, directly influencing the final character of your pan sauce and ultimately, your dish. Think of your liquid as a co-star to the star ingredient, designed to enhance, complement, and elevate the existing savory notes. A thoughtful pairing can transform a good meal into an unforgettable one, harmonizing flavors and adding layers of complexity that truly define gourmet home cooking. Here’s a guide to help you make informed and delicious decisions, ensuring your liquid gold perfectly complements your culinary creation:

  • Red Meats (Beef, Lamb, Venison): For robust flavors, dry red wines like Cabernet Sauvignon, Merlot, or Pinot Noir are classic choices. Their tannins and fruit notes beautifully cut through the richness of red meat. Beef stock or even a splash of brandy or bourbon can also add incredible depth and warmth, creating a truly luxurious and deeply savory pan sauce that sings with umami.
  • Poultry (Chicken, Turkey, Duck): Dry white wines such as Sauvignon Blanc, Pinot Grigio, or Chardonnay (unoaked) are excellent, offering a crisp acidity that brightens poultry. Chicken stock is another versatile and reliable option, providing a savory foundation without overpowering the delicate flavors. A touch of vermouth can also add an aromatic complexity.
  • Pork: Pork pairs wonderfully with a variety of liquids. Dry white wine works well, but for something different, consider apple cider or apple juice for a touch of sweetness that complements pork's natural profile. Bourbon or a robust hard cider can also introduce a unique, savory-sweet dimension, making for an incredibly flavorful and comforting sauce.
  • Fish and Seafood: Delicate white fish and shellfish demand lighter, brighter liquids. Dry white wines like Pinot Grigio or Muscadet are perfect. Fish stock provides a harmonious base, while a squeeze of fresh lemon juice or a splash of dry vermouth can add a zesty, herbaceous lift that enhances the fresh flavors of the sea.
  • Vegetables: When cooking vegetables, vegetable stock is a natural fit, reinforcing their earthy notes. For a tangy twist, balsamic vinegar or red wine vinegar can add a delightful sharpness, especially when reduced into a glaze. Even a simple splash of water or a light broth can effectively lift the vegetable fond, creating a lighter, yet still flavorful, sauce.

Remember, the goal is balance. Choose a liquid that will enhance, rather than overwhelm, the primary flavors of your dish. A little experimentation will quickly reveal your favorite combinations!

Beyond the Pan: What to Do with Your Liquid Gold

Once you’ve successfully deglazed your pan, you’re left with a rich, aromatic liquid – your "liquid gold." This isn't just a byproduct; it's the foundation for transforming your dish from ordinary to extraordinary. The true mastery of deglazing extends beyond the scraping; it lies in knowing how to utilize this concentrated essence of flavor to its fullest potential. This potent elixir, brimming with the savory depth of the Maillard reaction, is a versatile ingredient ready to infuse unparalleled richness into a multitude of culinary creations. Don't let a single drop go to waste; these applications are where your deglazing efforts truly shine, elevating simple home cooking to the realm of gourmet delight.

Here are several ways to incorporate this intensely flavorful liquid into your gourmet home cooking:

  • The Ultimate Pan Sauce: This is the most common and perhaps most satisfying application. After deglazing, continue to simmer the liquid, reducing it slightly. Whisk in a tablespoon or two of cold butter off the heat for a glossy, emulsified sauce. You can also add fresh herbs (thyme, rosemary), a squeeze of lemon juice, or a dollop of cream to further enhance its complexity. Serve this rich sauce directly over your seared meats, roasted chicken, or pan-fried fish for an immediate boost of restaurant-quality flavor.
  • Gravy Base: Deglazed drippings are the quintessential starting point for a truly spectacular gravy. After reducing the liquid, you can thicken it with a roux (a mixture of butter and flour) or a cornstarch slurry. This creates a deeply flavorful, silky-smooth gravy that's perfect for mashed potatoes, roasts, and holiday meals. The umami from the fond ensures a gravy that's anything but bland.
  • Glazes and Reductions: Simmer your deglazed liquid over low heat for an extended period, allowing it to reduce significantly until it becomes syrupy. This concentrated reduction makes an incredible glaze for roasted vegetables, a drizzle over grilled meats, or an elegant plate decoration. The flavors become incredibly intense and sweet-savory.
  • Enhancing Soups and Stews: Don't limit your liquid gold to just pan sauces. Add the deglazed liquid to your next batch of soup, stew, or chili. It will instantly infuse the entire pot with a profound depth of flavor that would otherwise take hours to develop. It's a fantastic shortcut to achieving a rich, long-simmered taste.
  • Flavoring Rice or Grains: Use the deglazed liquid as part of the cooking liquid for rice, quinoa, or other grains. This simple trick adds an incredible layer of savory flavor to what might otherwise be a plain side dish, making it a more integral and delicious part of your meal.
  • Marinades and Braising Liquids: Incorporate the deglazed liquid into your marinades for an extra punch of umami, or add it to your braising liquid for pot roasts, short ribs, or slow-cooked poultry. It contributes immensely to the richness and tenderness of slow-cooked dishes.

The possibilities are truly endless. By embracing deglazing, you’re not just cleaning your pan; you’re capturing the very essence of your cooked food, transforming it into a versatile flavor enhancer that will elevate nearly any savory dish you prepare.

Conclusion

Deglazing is far more than just a technique for cleaning a pan; it's a fundamental chef's secret, a testament to the power of understanding flavor and harnessing every bit of culinary potential. By transforming those humble, browned bits of fond into a rich, umami-packed liquid, you unlock an extraordinary depth that defines truly gourmet home cooking. This simple act elevates your sauces, gravies, and entire dishes, infusing them with savory complexity that will impress even the most discerning palates. Embrace deglazing, and you'll not only minimize waste but maximize taste, turning everyday meals into memorable culinary experiences. So, the next time you finish searing, remember the gold at the bottom of your pan. Scrape it, savor it, and let Savory Secrets guide you to more delicious discoveries!

Compound Butters: 10 Elevating Recipes for Gourmet Home Cooking

Compound Butters: 10 Elevating Recipes for Gourmet Home Cooking - Savory Secrets

Compound Butters: 10 Elevating Recipes for Gourmet Home Cooking

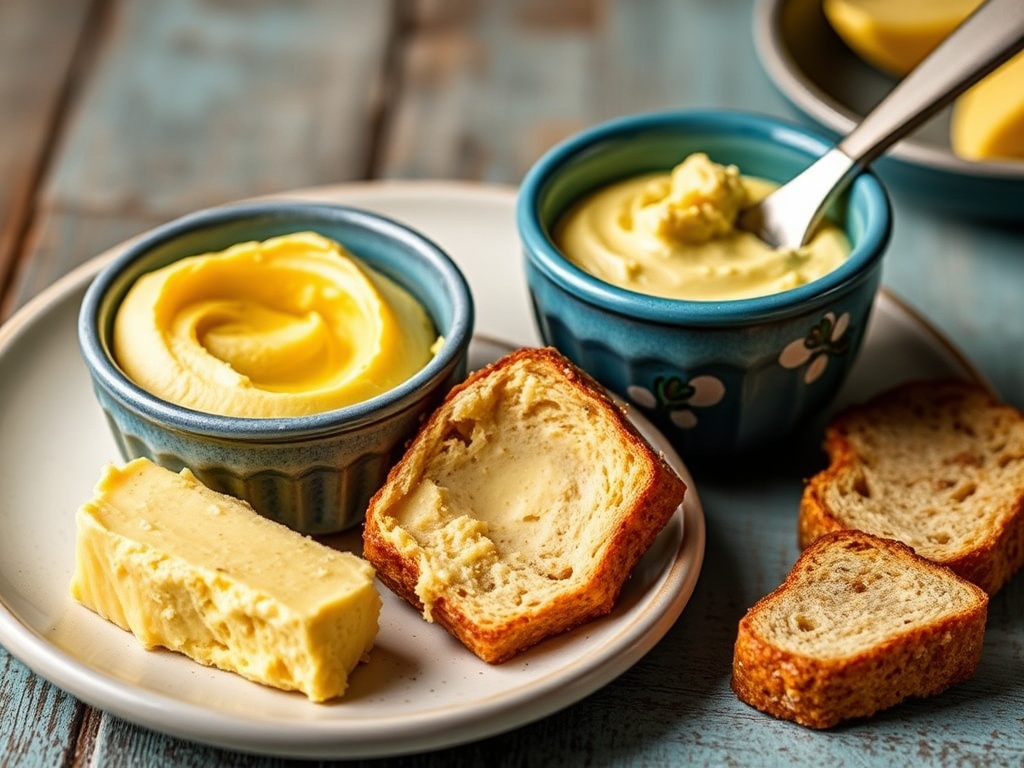
In the realm of gourmet home cooking, sometimes the simplest additions create the most profound impact. Enter compound butters: a true chef's secret weapon for infusing ordinary dishes with extraordinary flavor. These delightful blends of softened butter and aromatic ingredients are a testament to the power of thoughtful seasoning. From sizzling steaks to roasted vegetables, and even the humble slice of toast, a dollop of flavored butter can transform the mundane into the magnificent. Get ready to unlock a new dimension of savory secrets as we explore 10 incredible compound butter recipes designed to elevate your culinary creations and bring a touch of restaurant-quality magic to your kitchen.

The Art of Compound Butter: Why It's a Game-Changer

Compound butter, or beurre composé, is a culinary masterpiece born from simplicity. It’s essentially butter blended with various herbs, spices, aromatics, or other flavorings, then re-chilled to solidify. This seemingly minor step is a major game-changer for several reasons. Firstly, it offers unparalleled convenience; having pre-flavored butter ready to go means instant flavor boosts without chopping or measuring ingredients on the fly. Imagine pulling a perfectly seasoned pat of butter from your fridge to melt over a hot steak or toss with freshly steamed green beans – it’s instant gourmet. Secondly, compound butters allow for incredible flavor fusion. The fat in the butter acts as a magnificent carrier, absorbing and distributing the essence of the added ingredients, creating a more cohesive and intense flavor profile than if you were to add the components separately. It’s a secret weapon for adding richness, depth, and that coveted umami punch to countless savory recipes, making home cooking feel effortlessly sophisticated.

Crafting Your Own: The Basics & Beyond

Creating your own compound butter is an incredibly rewarding and straightforward process, putting you in control of the flavor destiny of your dishes. The beauty lies in its simplicity and versatility, allowing for endless experimentation to match any culinary craving or occasion. Whether you're aiming for bright and zesty, deeply savory, or subtly spicy, the basic method remains the same, ensuring consistent, delicious results every time. It’s an ideal way to utilize leftover herbs or experiment with new spice combinations, making it a sustainable and creative addition to your cooking repertoire. Here’s a step-by-step guide to mastering this fundamental technique:

  • Softening the Butter: The Foundation of Flavor
    Start with high-quality unsalted butter, softened to room temperature. This is crucial for easy mixing and ensures that all your chosen flavors are evenly incorporated without clumping. Avoid melting the butter entirely, as this will prevent it from re-solidifying properly.
  • Choosing Your Flavors: Herbs, Spices, & Umami Boosters
    This is where the magic happens! Finely chop fresh herbs like parsley, chives, dill, or rosemary. Grind spices such as smoked paprika, chili powder, or cumin. Consider minced garlic, shallots, citrus zest, sun-dried tomatoes, capers, or even a dash of soy sauce or miso paste for an umami kick.
  • Mixing & Rolling: Incorporating the Goodness
    In a bowl, combine the softened butter with your chosen flavorings. Use a spatula or the back of a spoon to thoroughly mix until everything is evenly distributed. Then, spoon the mixture onto a piece of parchment paper or plastic wrap. Roll it into a log shape, twisting the ends tightly to seal.
  • Storing & Using: Ready When You Are
    Chill the butter log in the refrigerator for at least an hour, or until firm. Once firm, you can slice off portions as needed. Compound butter can be stored in the refrigerator for up to a week or frozen for several months, making it a fantastic make-ahead option for gourmet home cooking.

The First Five Elevating Recipes: From Classic to Culinary Adventure

Now that you've mastered the art of making compound butter, let's dive into some specific recipes that promise to revolutionize your savory dishes. These first five selections span a range of flavor profiles, each designed to complement and elevate different types of ingredients, proving just how versatile and impactful a simple pat of flavored butter can be. They are perfect entry points for anyone looking to add a gourmet touch to their everyday meals, transforming ordinary ingredients into extraordinary culinary experiences with minimal effort but maximum flavor.

1. Garlic & Herb Butter: The Universal Enhancer
This classic blend is a must-have in any kitchen. Combine softened butter with finely minced garlic, chopped fresh parsley, chives, and a touch of sea salt and black pepper. Perfect for melting over grilled steaks, finishing roasted chicken, tossing with hot pasta, or slathering onto crusty bread for the ultimate garlic bread. It’s the foundational flavor booster that never disappoints, adding rich, aromatic depth to virtually any savory dish.

2. Lemon Dill Butter: Bright & Briny
A vibrant and refreshing butter, ideal for seafood lovers. Mix softened butter with fresh dill, lemon zest, a squeeze of lemon juice, and a pinch of salt. This bright and herbaceous butter melts beautifully over pan-seared salmon, baked cod, or grilled shrimp. It also adds a fantastic zing to steamed asparagus, roasted potatoes, or even a simple chicken breast, cutting through richness with its fresh acidity.

3. Chipotle Lime Butter: Smoky & Zesty Heat
For those who crave a kick, this butter delivers. Blend softened butter with finely minced chipotle in adobo (or chipotle powder), fresh lime zest, a splash of lime juice, and a hint of cumin. Excellent for slathering on grilled corn on the cob, melting over tacos or fajitas, or basting grilled chicken and pork. It brings a wonderful smoky depth and a zesty tang that brightens and invigorates.

4. Mushroom & Thyme Umami Butter: Earthy & Deeply Savory
An umami powerhouse that will transform your savory recipes. Combine softened butter with finely minced sautéed mushrooms (cremini or shiitake work well), fresh thyme leaves, a dash of Worcestershire sauce or soy sauce, and black pepper. This intensely savory butter is phenomenal on steak, stirred into risotto, tossed with roasted root vegetables, or even spread on a gourmet burger bun for an unforgettable flavor.

5. Roasted Red Pepper & Smoked Paprika Butter: Sweet & Smoky
This butter offers a beautiful balance of sweetness and smoky depth. Blend softened butter with finely chopped roasted red peppers (from a jar works great), smoked paprika, a pinch of cayenne for subtle heat, and a touch of salt. It’s fantastic melted over scrambled eggs, spread on a grilled cheese sandwich, or used to finish grilled chicken or fish, imparting a rich, complex flavor.

The Next Five Elevating Recipes: Expanding Your Gourmet Palette

Having explored some fantastic foundational and adventurous compound butters, let's delve into another five unique blends that will further expand your gourmet home cooking repertoire. These recipes introduce more global flavors and bold combinations, demonstrating the endless possibilities when you harness the power of infused butter. Each one is a testament to how a small addition can make a monumental difference in taste, offering chef-level complexity with minimal effort. Prepare to impress your taste buds and your guests with these inventive and deeply satisfying savory secrets.

6. Sun-Dried Tomato & Basil Butter: Mediterranean Magic
Capture the essence of the Mediterranean with this bright and tangy butter. Mix softened butter with finely chopped oil-packed sun-dried tomatoes, fresh basil leaves, a hint of garlic powder, and a pinch of salt. This butter is divine tossed with warm pasta, spread on bruschetta, melted over grilled chicken or fish, or even stirred into scrambled eggs for a burst of sunny flavor.

7. Miso Ginger Scallion Butter: Asian-Inspired Umami Bomb
An intensely savory and aromatic butter that brings an Asian flair to your dishes. Combine softened butter with white miso paste, grated fresh ginger, finely sliced scallions, and a touch of sesame oil. This umami-rich butter is incredible melted over pan-seared salmon, steamed vegetables, noodles, or even used as a finishing touch for stir-fries, adding layers of complex, savory flavor.

8. Blue Cheese & Chive Butter: Bold & Pungent
For lovers of strong, assertive flavors, this butter is a game-changer. Blend softened butter with crumbled blue cheese (Gorgonzola or Roquefort work well) and finely chopped fresh chives. This pungent and creamy butter is exceptional on a hot-off-the-grill steak, melted over a baked potato, or spread on a gourmet burger, providing a rich, savory counterpoint to robust meats.

9. Harissa & Mint Butter: Spicy & Refreshing North African Twist
Experience the vibrant flavors of North Africa with this exciting blend. Mix softened butter with harissa paste (adjust to your spice preference) and finely chopped fresh mint leaves. This butter offers a delightful balance of fiery heat and cooling freshness, perfect for slathering on grilled lamb chops, stirring into couscous, or melting over roasted carrots and sweet potatoes.

10. Truffle Parmesan Butter: Decadent & Luxurious
Indulge in pure luxury with this sophisticated compound butter. Combine softened butter with finely grated Parmesan cheese, a few drops of white or black truffle oil (a little goes a long way!), and a pinch of salt and pepper. This opulent butter elevates pasta dishes, risottos, roasted potatoes, or even simple popcorn to gourmet heights, adding an unmistakable earthy aroma and rich, cheesy depth.

Beyond the Basics: Chef Tips for Compound Butter Mastery

While the recipes above provide a fantastic starting point, truly mastering compound butters means understanding the nuances that elevate them from simple flavored butter to an indispensable chef’s secret. Think of compound butter not just as an ingredient, but as a finishing flourish, a flavor shortcut, and a way to introduce layers of complexity to your savory recipes. Here are some expert tips to help you wield this powerful culinary tool like a seasoned pro:

Balance is Key: When combining flavors, aim for harmony. Consider contrasting elements like acid (lemon zest), heat (chili), and freshness (herbs) with the richness of butter. Don't let one flavor overpower the others; taste and adjust as you go. For umami, ingredients like miso, sun-dried tomatoes, or mushroom powder can provide a deep, savory backbone without overwhelming the palate.

Texture Matters: The way you prepare your additions impacts the final butter. For smooth, evenly distributed flavor, finely mince or even purée ingredients like garlic, herbs, or sun-dried tomatoes. If you prefer a more rustic texture and occasional bursts of flavor, a coarser chop is fine for ingredients like roasted peppers or olives.

Strategic Application: Consider when and how you'll use your compound butter. For meats, place a pat on top of a hot steak or chicken breast right after it comes off the grill or out of the oven, allowing it to melt and create a luscious, flavorful sauce. For vegetables, toss them with a spoonful of melted compound butter after roasting or steaming. For sauces, whisk it in at the very end to enrich and thicken.

Pairing Prowess: Think about classic flavor pairings. Lemon and dill with fish, garlic and rosemary with lamb, or chipotle and lime with chicken are natural matches. Don't be afraid to experiment, but starting with known delicious duos can guide your creativity towards new, exciting savory secrets.

Freezing for Future Feasts: Compound butters are excellent for meal prep. Once rolled into logs and chilled, they can be sliced, wrapped individually in parchment, and then stored in an airtight container or freezer bag for up to three months. This means you always have gourmet flavor at your fingertips, ready to transform any meal into a special occasion.

Conclusion

From the foundational garlic and herb to the adventurous miso ginger scallion, compound butters are truly one of the most versatile and impactful tools in the gourmet home cook's arsenal. They offer an effortless way to infuse depth, richness, and an undeniable touch of chef-level sophistication into everyday meals. By mastering these savory secrets, you’re not just adding flavor; you’re unlocking a new realm of culinary creativity and efficiency. Whether you're elevating a simple piece of toast or finishing a prime steak, a homemade compound butter promises to transform the ordinary into the extraordinary, proving that sometimes, the smallest additions yield the biggest flavors. So, churn up some magic, experiment with our 10 elevating recipes, and let your kitchen become a haven of delicious discovery. For more savory recipes and cooking inspiration, keep exploring Savory Secrets!

Maillard Reaction: How to Master It for Unforgettable Savory Flavors

Maillard Reaction: How to Master It for Unforgettable Savory Flavors

Maillard Reaction: How to Master It for Unforgettable Savory Flavors

Have you ever wondered what creates that irresistible, deeply savory crust on a perfectly seared steak, the complex aroma of roasted coffee, or the rich golden hue of toasted bread? The secret lies in one of the most fundamental yet often misunderstood chemical reactions in cooking: the Maillard reaction. This culinary marvel is responsible for hundreds of flavor compounds and the alluring browning that elevates simple ingredients into gourmet masterpieces. At Savory Secrets, we believe understanding this phenomenon is a game-changer for any home cook. Get ready to unlock the true potential of your ingredients and transform your kitchen into a flavor laboratory.

What Exactly is the Maillard Reaction? The Science of Delicious

At its heart, the Maillard reaction is a complex series of chemical reactions that occur when amino acids (the building blocks of proteins) and reducing sugars interact under heat. Unlike caramelization, which involves only sugars and produces a sweet, nutty flavor, Maillard browning produces a vast spectrum of savory, meaty, roasty, toasty, and even fruity notes. It typically kicks off at temperatures above 285°F (140°C), creating hundreds of new flavor compounds and pigments responsible for the characteristic brown color and incredible aromas we associate with well-cooked food. Think of the crust on a perfectly roasted chicken, the rich color of a dark beer, or the depth in a browned onion – that’s the Maillard magic at play, transforming raw ingredients into something profoundly delicious and complex.

The Essential Ingredients for Maillard Magic

To successfully harness the Maillard reaction, you need to understand its fundamental requirements. It’s not just about applying heat; it’s about creating the perfect environment for these chemical transformations to occur. Without the right combination of elements, you’ll end up with steamed or boiled food rather than beautifully browned, flavor-packed dishes. Mastering these ingredients is the first step towards consistent, delicious results every time you step into the kitchen. Here are the key players:

  • Proteins/Amino Acids: Found abundantly in meats, poultry, seafood, dairy products, and many vegetables (like potatoes and onions). These are the reactive partners for the sugars.
  • Reducing Sugars: Present naturally in varying amounts in most foods. Glucose, fructose, and lactose are common examples. These sugars readily react with amino acids.
  • Sufficient Heat: The reaction typically begins around 285°F (140°C). This high temperature provides the energy needed for the molecules to break apart and recombine into new flavor compounds.
  • Low Moisture Environment: Water boils at 212°F (100°C), and as long as there's significant moisture on the surface of your food, its temperature won won't rise above that point. For Maillard to occur, the surface must be dry enough to exceed the boiling point of water.

Temperature Control: The Golden Rule for Perfect Browning

Temperature is arguably the most critical factor in achieving a successful Maillard reaction. The sweet spot is generally above 285°F (140°C), but it's not simply about cranking up the heat to the maximum. Too low a temperature, and your food will steam and soften without browning; too high, and you risk burning the surface before the interior cooks or before the complex flavors fully develop. The goal is consistent, high heat that allows the surface to dry out quickly and reach the browning temperature. When searing, preheat your pan thoroughly until a drop of water sizzles and evaporates almost instantly. For roasting, ensure your oven is fully preheated to the recommended temperature. Different cooking methods like grilling, pan-searing, roasting, and deep-frying all leverage high temperatures to initiate and sustain the Maillard reaction, each contributing unique nuances to the final flavor profile. Precision in temperature is key to unlocking the full spectrum of savory notes without any burnt bitterness.

Moisture Management: The Enemy of Browning

While heat is the accelerator, moisture is the antagonist of the Maillard reaction. Water boils at 212°F (100°C), and as long as there is moisture on the surface of your food, its temperature will not rise above that point. This means no Maillard browning can occur. Imagine trying to sear a steak directly out of a marinade – the surface will steam rather than brown. Therefore, meticulous moisture management is paramount for achieving that coveted crust. Always pat your ingredients thoroughly dry with paper towels before applying heat. For meats, consider dry brining in advance or allowing them to air-dry in the refrigerator for a few hours, which significantly reduces surface moisture. When cooking, avoid overcrowding your pan; this lowers the pan’s temperature and causes food to release its moisture, leading to steaming instead of searing. Use oils with a high smoke point, which can withstand the necessary high temperatures without breaking down and imparting off-flavors. By controlling moisture, you pave the way for superior browning and deeper flavor.

Acid, Alkali, and Time: Fine-Tuning Your Flavor Palette

Beyond temperature and moisture, other factors can significantly influence the Maillard reaction, allowing you to fine-tune your flavor outcomes. Acidity, for instance, generally inhibits the Maillard reaction. This is why highly acidic marinades can sometimes prevent a good crust from forming on meat. However, acid isn't always the enemy; it can be used strategically. Deglazing a pan with wine or broth after searing not only captures the flavorful 'fond' (the browned bits) but also introduces acidity that can balance the richness. Conversely, an alkaline environment can accelerate the Maillard reaction. A common chef's trick is to lightly coat chicken wings or certain vegetables with a pinch of baking soda (sodium bicarbonate) before cooking. This slightly raises the pH on the surface, promoting faster and more intense browning, resulting in incredibly crispy skin or deeper caramelization. Finally, time plays a crucial role. While the reaction begins quickly, sustained exposure to the right conditions allows for the development of more complex and numerous flavor compounds, deepening the savory notes and creating a more robust crust. Experiment with these variables to truly master your Maillard technique.

Advanced Maillard Techniques & Applications for Gourmet Home Cooking

Once you grasp the fundamentals, you can apply Maillard mastery to a vast array of dishes, transforming everyday cooking into gourmet home cooking. Consider the reverse sear method for steak: gently cooking the interior at a low temperature first, then finishing with a high-heat sear to develop an impeccable crust without overcooking the center. This technique maximizes Maillard while ensuring perfect doneness. For vegetables, don't just steam them; roast them at high temperatures with a little oil until they develop sweet, caramelized edges, unlocking their hidden umami. Developing a rich fond in your pan after searing meat is another Maillard triumph; deglaze with wine or stock to create incredibly flavorful sauces and gravies. Browning butter until it turns a nutty, golden-brown (beurre noisette) adds an unparalleled depth to both sweet and savory dishes. Even simple tasks like toasting nuts and spices in a dry pan awaken their essential oils and intensify their flavor profiles through controlled Maillard browning. From making rich, savory stocks to creating the perfect crust on bread, understanding and intentionally applying the Maillard reaction will elevate every aspect of your culinary repertoire, making your dishes truly unforgettable.

Conclusion

The Maillard reaction is more than just a scientific principle; it's the invisible hand that guides so many of our most cherished savory flavors. By understanding its core requirements – the interplay of amino acids, sugars, heat, and crucially, the management of moisture – you gain the power to consistently create dishes that boast incredible depth, complexity, and that irresistible golden-brown crust. No longer will you leave browning to chance; instead, you'll intentionally orchestrate this culinary magic, transforming everyday ingredients into gourmet masterpieces. Embrace the science, experiment with the techniques, and watch as your cooking reaches new heights of deliciousness. What's your favorite dish where the Maillard reaction shines brightest? Share your savory secrets and Maillard masterpieces in the comments below!

Deglazing Pan Drippings into Gold

Deglazing Pan Drippings into Gold - Savory Secrets Deglazing Pan Drippings into Gold Every home cook dr...