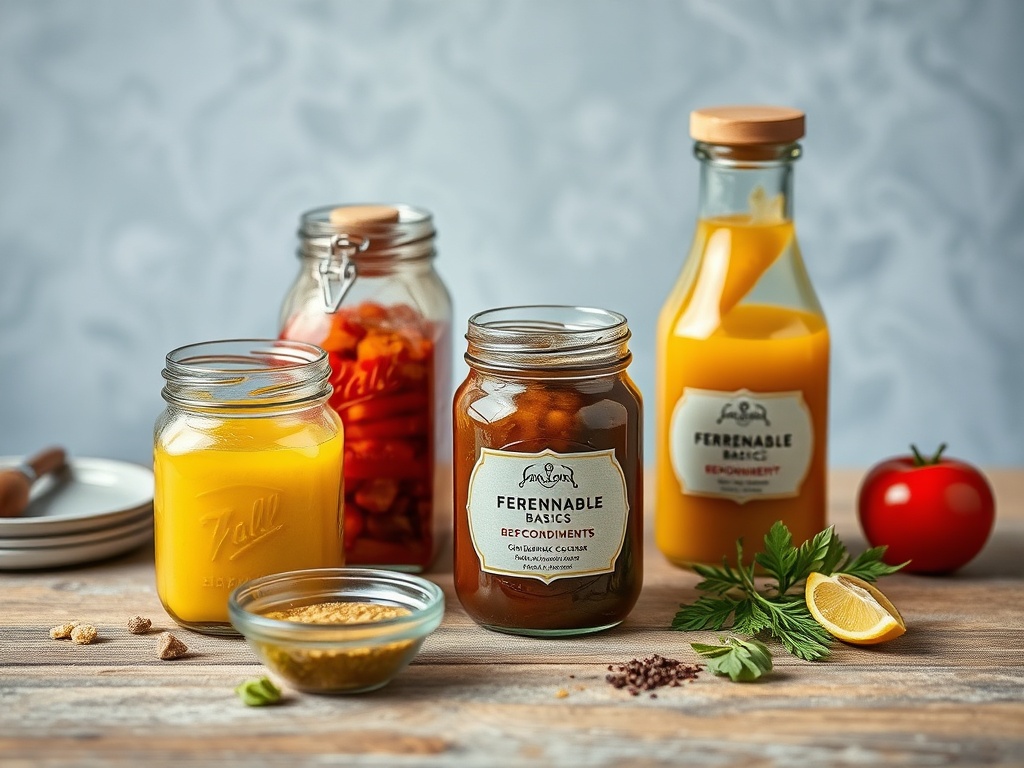
Fermentation Basics: Crafting Homemade Condiments for Ultimate Umami
Welcome, culinary adventurers, to the deeply satisfying world of fermentation! At Savory Secrets, we're obsessed with unlocking profound flavors, and few techniques rival the magic that microorganisms bring to our plates. Forget bland, store-bought condiments; imagine vibrant, tangy, umami-rich creations born right in your own kitchen. Fermentation isn't just an ancient preservation method; it's a living art form that transforms simple ingredients into complex flavor bombs, elevating everything from a humble sandwich to a gourmet meal. Join us as we demystify the basics, guiding you through the simple steps to create your own homemade fermented condiments, brimming with character and a depth of flavor that will revolutionize your cooking.
The Ancient Art of Fermentation: Why It Belongs in Your Kitchen
Fermentation, at its heart, is a controlled process where beneficial microorganisms – primarily bacteria and yeasts – break down carbohydrates into acids, gases, or alcohol. This transformative process has been harnessed by humanity for millennia, long before refrigerators or canning were even dreamt of, primarily as a means of preservation. Think of the sauerkraut that sustained ancient Germanic tribes or the kimchi that has been a staple in Korean cuisine for centuries. These aren't just historical curiosities; they are delicious testaments to fermentation's enduring power.
But beyond mere preservation, fermentation is a flavor powerhouse. It's the secret ingredient that introduces incredible complexity, developing tangy, sour, pungent, and, most importantly for us at Savory Secrets, deeply umami notes. These microorganisms don't just preserve; they create. They synthesize new compounds that contribute unique aromas and tastes, often enhancing the natural flavors of the ingredients and introducing entirely new dimensions. This enzymatic activity also boosts the bioavailability of nutrients, making fermented foods easier to digest and often more nutritious thanks to the production of beneficial probiotics. For the home chef aspiring to gourmet heights, incorporating fermented condiments means adding layers of sophisticated flavor, natural zest, and a touch of the extraordinary to every dish, all while embracing a sustainable and hands-on approach to food.
Essential Tools and Ingredients for Your Fermentation Journey
Embarking on your fermentation adventure doesn't require a laboratory or specialized, expensive equipment. In fact, one of the beauties of this craft is its simplicity and accessibility. You likely already possess many of the fundamental tools in your kitchen. The key is to ensure everything is clean and, where appropriate, sterile, to give your beneficial microbes the best chance to thrive without competition from undesirable pathogens. Investing in a few basic items will set you up for success and open up a world of possibilities for creating vibrant, healthy, and incredibly flavorful condiments. Remember, quality ingredients form the foundation of any great dish, and fermented creations are no exception – choose fresh, high-quality produce for the best results.
-
Glass Jars: Your primary fermentation vessel. Wide-mouth Mason jars are ideal due to their durability, ease of cleaning, and compatibility with various lids and weights. Sizes ranging from pint to half-gallon are excellent for different batch sizes. Always sterilize your jars and lids by boiling them or running them through a hot dishwasher cycle before use to eliminate any competing bacteria.
-
Airlocks and Fermentation Lids: While not strictly mandatory for every ferment (you can "burp" jars manually), airlocks create an anaerobic environment, allowing gases to escape without letting oxygen in. This minimizes the risk of mold and creates a more stable fermentation. Specialty lids with one-way valves or silicone inserts are readily available and highly recommended for beginners, simplifying the process and reducing maintenance.
-
Fermentation Weights: Keeping your ingredients submerged beneath the brine is crucial to prevent exposure to oxygen, which can lead to mold growth. Glass weights designed for Mason jars are perfect for this. Alternatively, you can use a smaller glass jar filled with water or even a clean, heavy rock (sterilized!) placed on top of a cabbage leaf or plastic bag filled with brine to hold everything down.
-
Non-Iodized Salt: This is a non-negotiable ingredient. Regular table salt often contains iodine and anti-caking agents, which can inhibit the beneficial lactic acid bacteria we want to cultivate and sometimes lead to off-flavors or cloudy brine. Opt for pure sea salt, kosher salt, or pickling salt. The salt creates the brine, which draws out moisture from vegetables, inhibits spoilage organisms, and favors the growth of our desired lactic acid bacteria.
-
Filtered Water: If your tap water is heavily chlorinated, it's best to use filtered or distilled water. Chlorine can interfere with the delicate microbial balance necessary for successful fermentation. Simply letting tap water sit out for 24 hours can also allow the chlorine to dissipate, making it suitable for use.
Crafting Your First Fermented Condiments: A Step-by-Step Guide to Brine Fermentation
Let's dive into the delicious practicalities! Brine fermentation is arguably the most straightforward and forgiving method for beginners, perfect for crafting everything from tangy pickles to vibrant hot sauces. The principle is simple: submerge your chosen ingredients in a saltwater solution (brine), which creates an environment where beneficial lactic acid bacteria thrive, transforming and preserving your food. For your first foray, we recommend a classic fermented hot sauce or some crisp, dilly fermented green beans – both are wonderfully rewarding and relatively quick to ferment.
Begin by selecting your ingredients. For a hot sauce, choose your favorite chilies (e.g., jalapeños, serranos, habaneros), garlic, and perhaps some onion or carrots for depth. Wash your produce thoroughly and chop them as desired – for hot sauce, a rough chop is fine as it will be blended later; for pickles, keep them whole or in spears. Next, prepare your brine. A common starting point is a 2-3% salt solution: for every liter of filtered water, dissolve 20-30 grams of non-iodized salt. Stir until the salt is fully dissolved. Now, pack your chopped vegetables tightly into your sterilized glass jar, leaving about an inch or two of headspace at the top. Pour the prepared brine over the vegetables, ensuring they are completely submerged. This is where your fermentation weight comes in; place it on top to keep everything below the brine line. Secure your jar with an airlock lid or a regular lid (loosened daily to "burp" out gases).
Place your jar in a cool, dark spot, ideally between 65-75°F (18-24°C), away from direct sunlight. Within a day or two, you should start seeing bubbles – a clear sign that the fermentation is active! The brine might become cloudy, and a harmless white film (kahm yeast) might form on the surface; this is all normal. Ferment for 5-14 days, or even longer for more intense flavor. Taste regularly after the first week; when it reaches your desired tanginess and flavor profile, fermentation is complete. For hot sauce, blend the fermented vegetables and some of the brine to your preferred consistency, then bottle. Store your finished condiments in the refrigerator, where the cold temperature will significantly slow down the fermentation process, preserving their peak flavor for months. Congratulations, you've just made your first living condiment!
Beyond Brine: Exploring Dry Salting and Koji-Based Fermentation for Umami Bombs
While brine fermentation is a fantastic starting point, the world of savory fermentation extends far beyond. Two other compelling methods, dry salting and koji-based fermentation, offer distinct pathways to creating incredibly complex and umami-rich condiments. Mastering these techniques opens doors to truly artisanal creations that will impress even the most discerning palates.
Dry salting is a method where salt is directly applied to vegetables without the addition of any water. The salt draws out the natural moisture from the produce, creating its own brine. This technique is famously used for making sauerkraut, kimchi, and some types of fermented pickles. To dry salt, simply shred or chop your vegetables (e.g., cabbage for sauerkraut), sprinkle them with a calculated amount of non-iodized salt (typically 2-2.5% of the vegetable's weight), and massage or pound them until they release enough liquid to create a self-made brine. Pack them tightly into a jar, ensuring the vegetables are submerged under their own liquid, and follow similar steps for weighting and airlock setup as with brine fermentation. Dry salting often results in a firmer texture and a more concentrated flavor profile, making it perfect for crunchy, tangy accompaniments.
For those truly seeking to unlock the ultimate umami, koji-based fermentation is the next frontier. Koji (Aspergillus oryzae) is a filamentous fungus cultivated on grains like rice, barley, or soybeans. It produces powerful enzymes that break down proteins into amino acids (like glutamate, the source of umami), starches into sugars, and fats into fatty acids. Koji is the foundational ingredient for iconic Japanese condiments like miso, soy sauce, and shio koji. While making homemade miso or soy sauce is a longer, more involved process, incorporating shio koji (a fermented paste of koji, salt, and water) into your cooking is relatively easy and a game-changer for umami. Shio koji acts as a tenderizer, marinade, and flavor enhancer, infusing meats, vegetables, and dressings with incredible depth. Exploring koji fermentation, while more advanced, promises unparalleled levels of savory complexity and is a true testament to the gourmet possibilities of microbial magic.
Troubleshooting and Safety: Ensuring a Successful Ferment
As with any culinary adventure, especially one involving living organisms, a few hiccups can occur. However, understanding common issues and prioritizing safety will ensure your fermentation journey is both successful and delicious. The vast majority of fermentation "failures" are easily identifiable and preventable, usually stemming from insufficient cleanliness, improper salt ratios, or exposure to oxygen. Don't be discouraged by a less-than-perfect batch; every ferment is a learning experience that hones your instincts and understanding of this incredible process.
One of the most frequent sights that can alarm beginners is the appearance of a white film on the surface of their brine. This is most often "kahm yeast," a harmless, pellicle-forming yeast that thrives in oxygen-rich environments. It looks like a thin, wrinkled, opaque white layer. While it won't harm you, it can sometimes impart an off-flavor, so it's best to skim it off if it appears. Kahm yeast is a sign that your ferment might have too much oxygen exposure, so ensure your weights are keeping everything submerged and your airlock is working correctly. Far more concerning is fuzzy, colorful mold (green, black, pink, blue). If you see any fuzzy growth, especially with distinct colors, it means undesirable mold has taken hold. Unfortunately, it's best to discard the entire batch, as mold can produce toxins that are not safe to consume, even if you try to skim it off. When in doubt, always err on the side of caution and dispose of the ferment.
Smell is your most reliable guide. A healthy ferment should smell pleasantly sour, tangy, sometimes cheesy, or even subtly fruity. It should never smell putrid, rotten, or like sulfur. If you encounter an overwhelmingly foul odor, something has gone wrong, and it's safest to discard it. Maintaining cleanliness throughout the entire process – from sterilizing jars to washing your hands and utensils – is paramount. Always use non-iodized salt and filtered water as discussed. Ensure your ingredients remain fully submerged beneath the brine; this anaerobic environment is critical for encouraging beneficial lactic acid bacteria and discouraging harmful pathogens. Temperature also plays a role: too warm, and fermentation can proceed too quickly, leading to mushy results or off-flavors; too cold, and it can stall. Aim for a consistent room temperature. By paying attention to these details, you'll cultivate successful, safe, and sensationally savory homemade condiments every time, building confidence with each delicious batch.
Conclusion: Unlocking a World of Flavor: Your Fermentation Adventure Awaits
The journey into homemade fermented condiments is more than just a cooking technique; it's an exploration of flavor, a rediscovery of ancient wisdom, and a profound connection to the food you eat. From the simplest brine-fermented hot sauce to the intricate umami of koji-based creations, you now possess the foundational knowledge to transform everyday ingredients into extraordinary culinary masterpieces. You’re not just making food; you’re cultivating living flavor, enriching your diet with beneficial probiotics, and gaining an unparalleled depth of taste that store-bought alternatives simply can't match. Embrace the tang, the funk, and the incredible umami that only fermentation can deliver.
So, grab your jars, gather your ingredients, and dare to experiment! The most rewarding aspect of fermentation is the endless possibility for customization and creation. Let your palate be your guide, and don't be afraid to try new vegetables, spices, or combinations. The world of savory secrets is vast, and with fermentation, you hold the key to unlocking some of its most profound and delicious mysteries. Share your successes, learn from your experiments, and most importantly, savor every bite. What will be the first incredible condiment you ferment? We can’t wait to hear about your flavorful creations! Explore more umami-rich recipes and chef tips right here at Savory Secrets.


Aucun commentaire:
Enregistrer un commentaire